
Given how important the TV is, it makes sense to spend a bit of time setting everything up properly. In this guide on how to improve your TV's picture, we’ll take you through everything you need to know, from physical location to the settings that you need to tweak.
For those with high-end televisions, paying a professional to come and calibrate your TV can work wonders. If you don’t fancy the expense, this guide on manually configuring the best options will still dramatically improve your experience. Here’s what you need to do.
Place your TV carefully
Before you even start with your TV’s settings, you should place it in the right position. A TV should be positioned so that you can look at it straight on. Ideally, this means that your eye line should fall roughly one-third of the way down the screen as measured from the top when you’re sat down. That gives you a comfortable viewing angle.
If you’re going to wall-mount your TV, the same rules apply. Avoid putting the TV above a fireplace if you can. You may think it’s the best place but there are two main issues. First, you have to crane your neck to watch, which is uncomfortable. Secondly, TV’s are designed to be viewed head-on; when they’re placed higher, the viewing angle is wrong, so the picture can look slightly washed out.
Choose the viewing mode
For the next sections, you’ll need to delve into your TV’s settings. The menus differ from manufacturer to manufacturer, and from model to model, so you may need to refer to your manual for more detailed information.
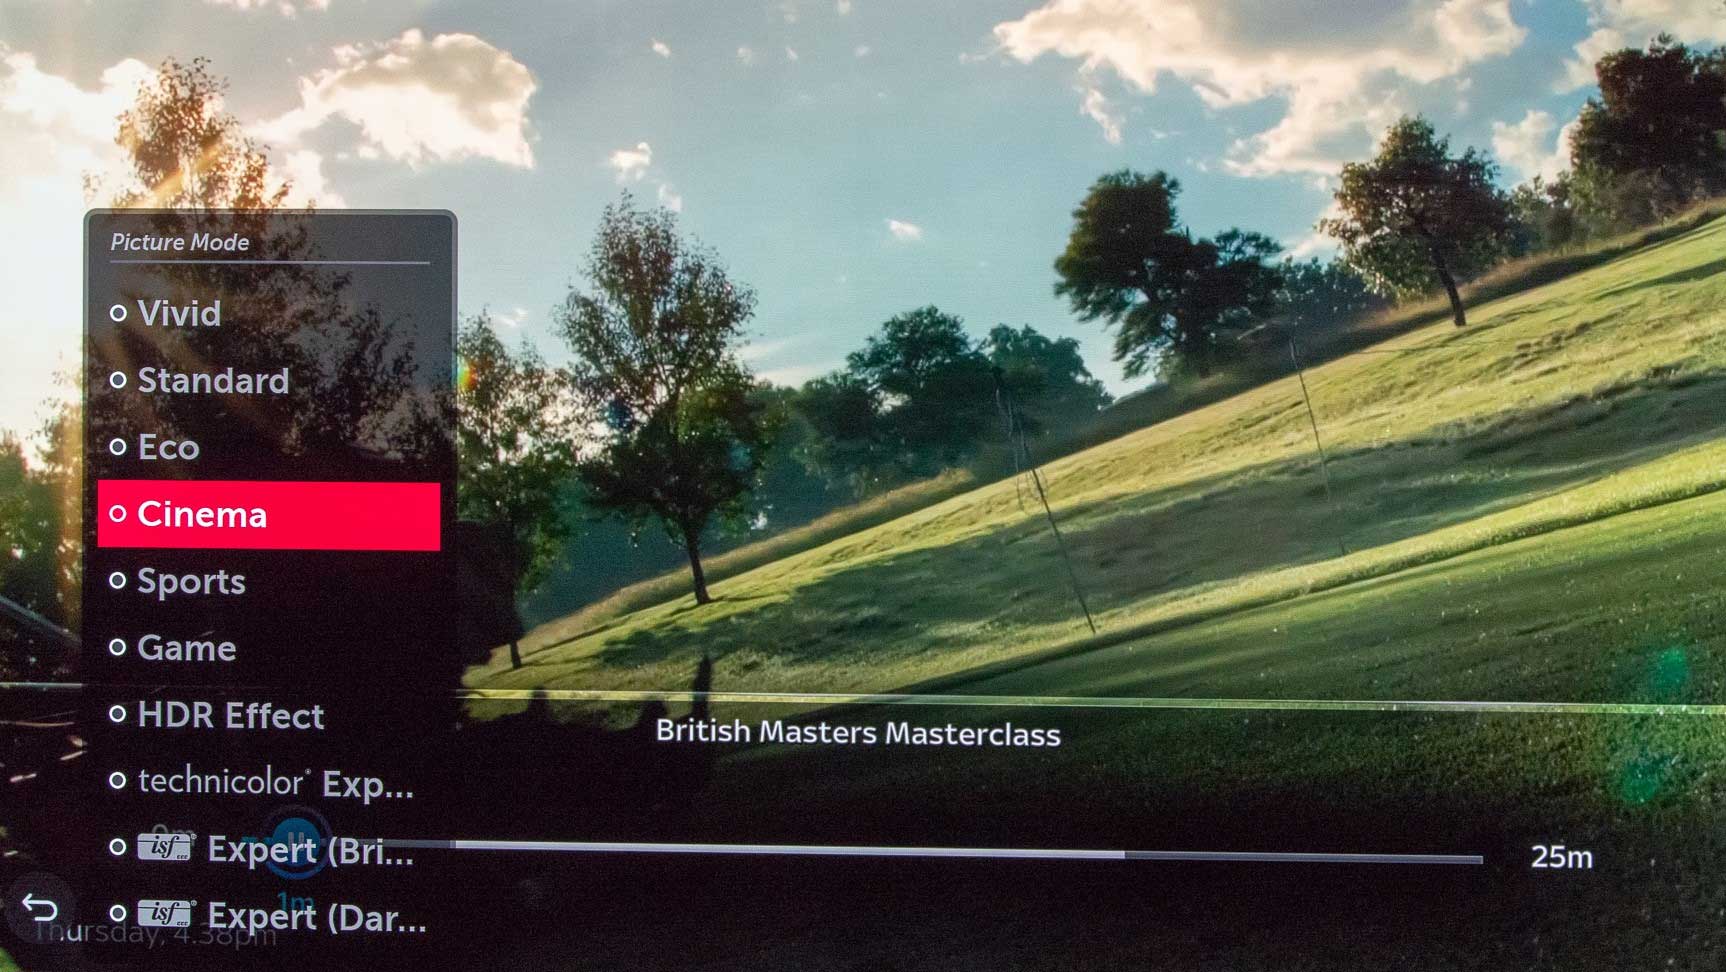
Every TV has multiple pre-defined viewing modes, each with its own viewing settings. They’re designed to give you a quick way to find a setting that you personally prefer. Picture modes are typically quite easy to find in your TV’s settings menu.
The Cinema mode tends to have the most realistic colours, although things can look quite muted, so you may prefer a brighter mode. Be warned, if you go for a more vivid setting, colours can be hyper-realistic. Expert modes are often on offer, providing more detailed controls aimed at professional calibrators.
All modern TVs will have a special Game mode, for consoles. This turns off a lot of the processing on the TV, which can degrade image quality. However, it speeds up games and makes them less sluggish to play.
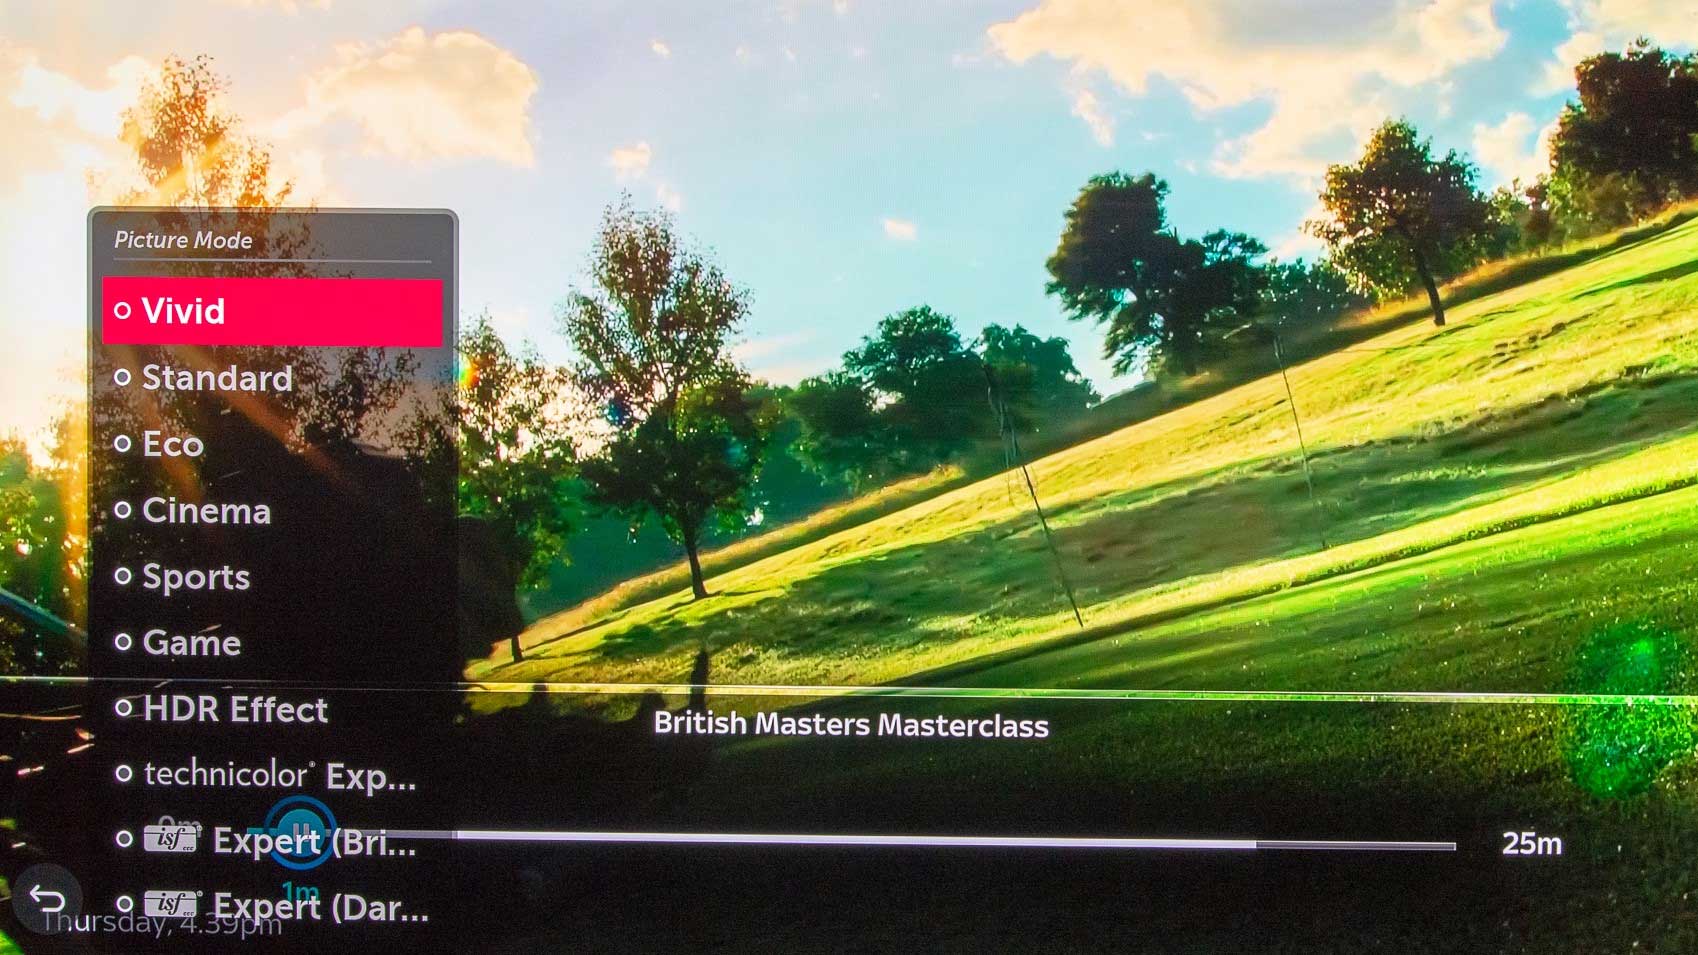
In Cinema mode colours are quite muted but there’s plenty of detail in the sky. Switching to Vivid mode makes the colours jump out but there’s less detail in the sky.
Adjust the picture settings
Once you’ve settled on a TV mode, although it might look right to you, you can further tweak the image to improve the picture. We will take you through the main choices, helping you find the right balance. Ultimately, you may need to go through these steps a few times to get the right balance, as adjusting one setting can have a knock-on effect on another one.
Contrast
Contrast defines the difference between the brightest and darkest parts of the screen. On a TV, the contrast setting changes this by adjusting the highlights (the brighter, whiter parts of the picture). If you turn the contrast up to high, you can lose detail in the highlights with the image looking blown out; turn it down and you start to lose some detail and the image can look dull.
To set contrast properly, find a scene on a TV programme or film that you can pause. Something outside with a good amount of cloud on a bright day is usually a good idea; avoid dark scenes as the contrast control won’t make much difference. Look for a high-quality programme: something in HD is best so that you have the most amount of detail.
Adjust the contrast to the maximum point, then step down until you get all of the detail in the brightest part of the image. If you go too far, whites will look murky, so step up the contrast again.
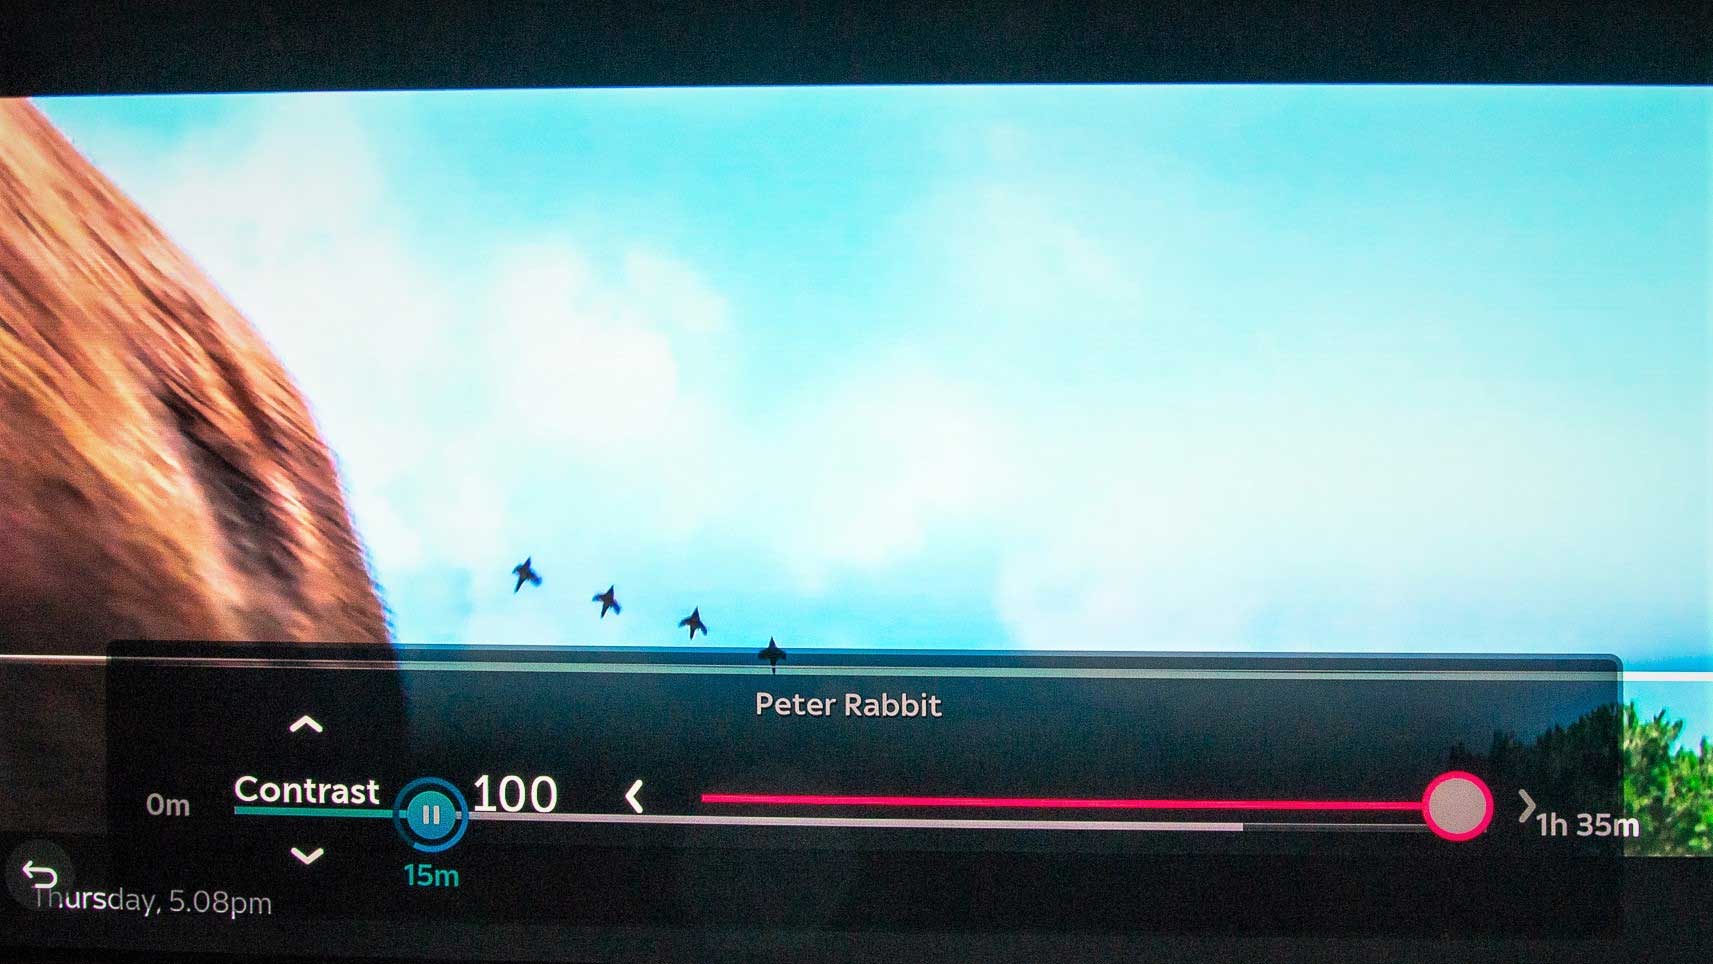
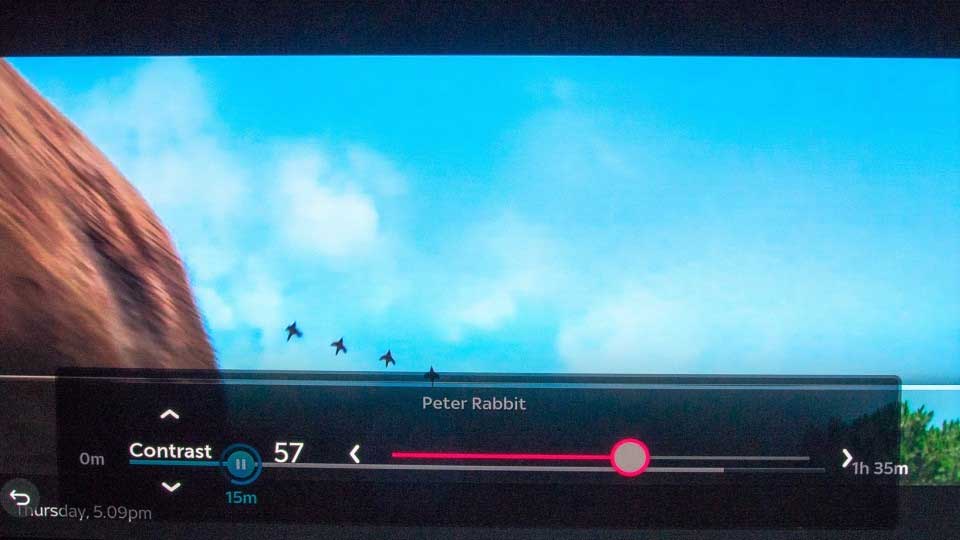
Turning the contrast up makes the sky brighter, but the clouds blend into one. Turning the contrast down brings out the blue in the sky and it’s easier to make out individual clouds.
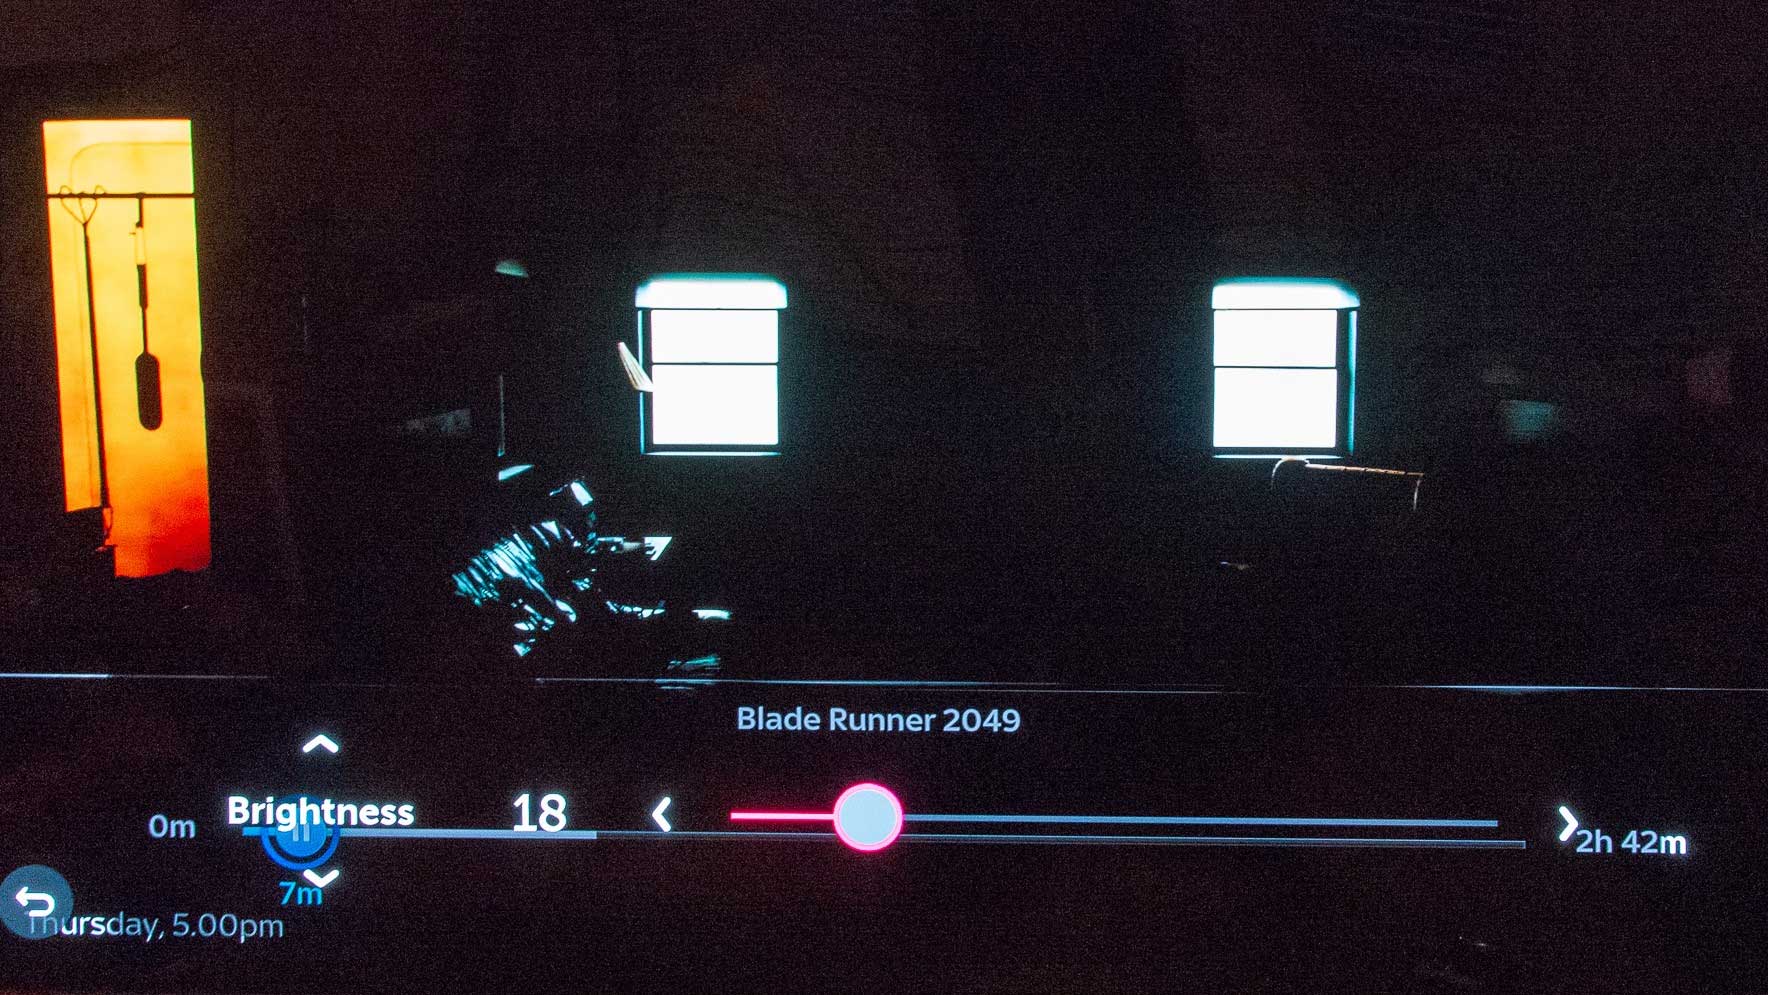
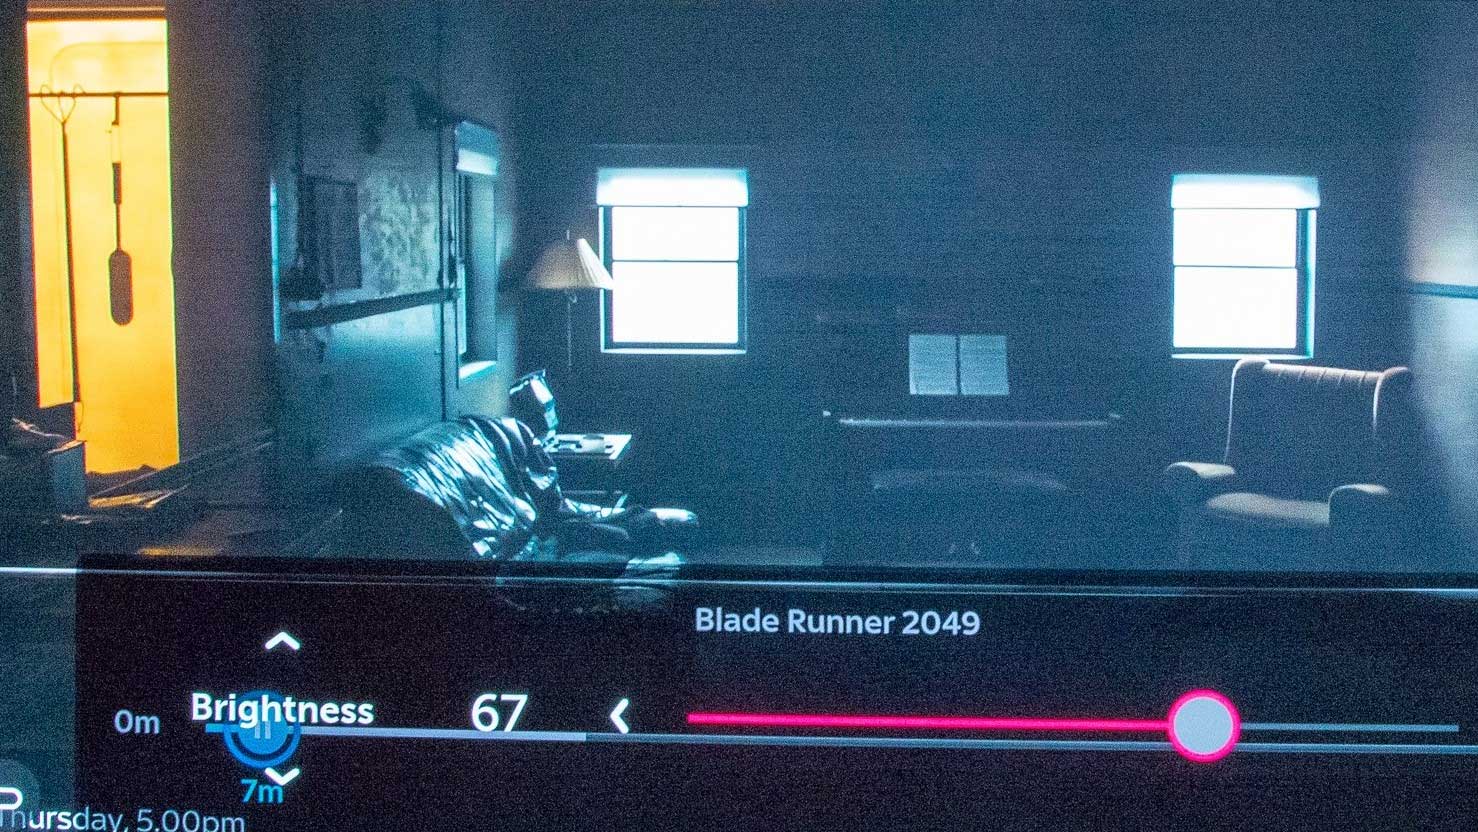
Brightness
The brightness setting on a TV doesn’t deal with the overall screen brightness (that’s the backlight/OLED light control below). Instead, brightness deals with shadow detail: the darker parts of the image.
To adjust this setting, you should find a scene that’s largely in shadow. Turn the brightness right down, then slowly edge it back up until the all of the detail in the scene is visible. If the image looks washed out and blacks look very grey, you’ve probably gone too far.
Backlight/OLED light
On an LCD TV, the image is created with a light at the back that shines through. The backlight controls the intensity of this and the overall brightness of the screen, without affecting the brightness and contrast settings that you’ve defined.
The main use of this control is to configure your TV for the level of ambient light: in a bright room, you can turn up the backlight control; in a dark room, turn it down. Think of it in the same way that you view your phone. When you’re outside, you need it to be bright but inside at night, the screen can be dimmer. When you can’t see the screen clearly, adjust the backlight control, not the brightness control.
The OLED light control is the same kind of setting only for OLED TVs. In some viewing modes, you may find that the backlight or OLED light control is disabled by default, but you can re-enable this control.
Sharpness
Sharpness is a control designed to sharpen a soft image. It’s not something that I recommend playing with too much: turn the setting up and you’ll start to see a halo effect around objects that ruins the picture. Leave this one at the factory default or try turning it down.
Colour
The colour control is for saturation. Turn it down too far and colours will look a little dull; turn it up too far and colours suddenly become over-saturated and start to look unrealistic. Try leaving this setting alone if you can.
Colour temperature
Colour temperature or colour tone, if available, changes the white balance. Typically, you can get colder temperatures (everything starts to look blue) or warmer (the image starts to look yellow or red). The standard setting, in most cases, is best, but if you do change the setting go for a warmer colour as this looks more natural.
Colour tint
The colour tint control is hang-up from old CRT televisions that lets you make the picture looker redder or greener. There’s very little reason to change this setting any more, so leave it alone.
Motion smoothing
Motion smoothing is something that top Hollywood directors and stars, such as Tom Cruise, have been complaining about. Your typical TV is capable of showing at least 50 frames (images) per second (fps), although many can show far more, up to 100fps or higher.
Films are shot at 24fps, although they’re sped up to 25fps for UK TVs. At this frame rate, your TV has to show each frame twice to hit 50fps, or more if you have a TV with a higher refresh rate. The result is that motion can look juddery.
With motion smoothing, your TV interpolates (that is, creates) additional images between the existing frames to smooth the motion. The result is often a rather unnatural looking picture with people moving more like they were cartoons or shot on home video. If your TV is making films and TV shows look unrealistic, the chances are that it’s the motion smoothing settings
The motion smoothing setting differs from TV to TV, and it’s usually buried a few options deep. The setting may be called something like Motion Smoothing, although there are some brand-specific names including TruMotion (LG), Intelligent Frame Creation (Panasonic) or Motionflow (Sony). Once you’ve found the setting, either turn it off completely or turn it down until you’re happy with the picture.
Looking for a Freeview Play TV? Check out our Product section


